


This summer, we are replacing 1,500 computers! That means 1,500 older computers are being resold to a company. These machines currently have our OS, applications, some personal data, and other information stored on them. Because we lock down our BIOS, the company buying them can’t use a CD/USB drive to wipe them. If the company wanted to reset the BIOS, they would have to remove the jumper on any Desktops and would probably need our BIOS password on any laptops. Instead of manually wiping these machine and resetting the BIOS, let’s automatically format computer with MDT!

In the picture above, you’ll notice that we have a task sequence named Format. This task sequence really only does two things: formats the drive and remove certain BIOS settings. Here is how you can create one:
Step 1: Create the Task Sequence
You will want to create a new task sequence first. Your template will be the Standard Client Task Sequence. When you select your OS, pick your most commonly deployed OS and proceed through the wizard. Your main goal here is just to get a task sequence that you can edit.

Step 2: Start Deleting Phases
Your task sequence will start with seven phases. Delete all of the phases except: Initialization, Validation, and PreInstall. Expand the PreInstall phase and disable the Copy scripts task. You will also want to disable the Inject Drivers and Apply Patches tasks. This will shave some time off of the task sequence.

Add a new task to Restart the Computer. This task can be found under Add and then General. Move this task to the end of the Task Sequence.
Step 3: Get your BIOS Tools
So far, you have a task that formats and repartitions the hard drive. If you have a BIOS password, you’ll want to remove it from your old machines. This step will work for Dell machines. To have it fit another manufacture, just substitute the BIOS configuration tool that we use below.
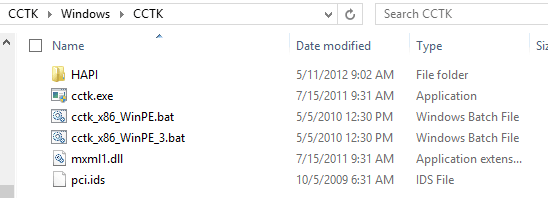
Download the Dell Client Configuration Toolkit (CCTK) for Windows. Once installed, browse to the CCTK folder in Program Files and open the X86 folder. Copy the contents. On your DeploymentShare, browse to the Tools folder. Create a new folder named CCTK. Create a subfolder named Windows. Create a sub-sub folder named CCTK. Paste the contents of the X86 folder within \DeploymentShare\Tools\CTTK\Windows\CCTK\
Open up Properties on your DeploymentShare and select the Windows PE tab. Under Extra directory to add, type the path to the Tools\CCTK folder. Update your Deployment Share and replace the updated boot images on your network boot server. You now have a Windows PE version of CCTK added to your boot image!

Step 4: Edit the BIOS
The hard work is now done. Add one final Command Line task right in your Format task sequence and name it Remove BIOS Password. I placed mine right before the Restart Computer task. For the command line, enter: cctk.exe –setuppwd= –valsetuppwd=CURRENTPWD. This command sets the BIOS password to nothing. For the Start in, enter: X:\Windows\CCTK\

All you have left to do is to change what task sequence your clients use and PXE boot them. We have wiped around 1,000 clients with this method so far. In fact, some of our schools had an end of year check list for teachers. One item was to PXE boot their machine and then unhook the device! If the AD computer accounts won’t be used, don’t forget to clean up the accounts before they become stale. Nobody likes a stale computer!
Do you want to learn how you can deploy these settings through Group Policy and lock down your BIOS settings, then start on Part 1 of our Managing the Dell BIOS series.
Joseph,
Thanks for writing this great article! I’ve got it running and changing the BIOS settings. However, whenever I place my BIOS settings’ edits into my TS at the place you recommend, after the reboot back into WinPE, it’s as if my it can’t load anything in the deployment share.
For example, if I place it before the drivers install, it won’t find the drivers after the restart. If I place it after the drivers install, but before the OS install, it won’t find the WIM.
If I look through the logs, it shows that it’s already connected to the share after the reboot.
Any ideas about what might be wrong?
I don’t… can you email me your logs though? My email contact is in the top right of this page.
Hello, I have followed your steps exactly the same but , this does not seem to be working since it is giving on me.
Hi Chris,
Yellowstone was amazing! We kind of missed our connecting flight so we are now stranded in Chicago for a while…anyways,
You have two options for doing this. If you only want to set the BIOS password (and not configure anything else), use CCTK in a task sequence. If you want to update the BIOS password at time or set other settings, use a CCTK collection and deploy it with Group Policy.
I’ve been meaning to write this up! Expect an article soon(ish)! Also, thank you for commenting and letting me know that you appreciate the blog!
Joseph
Joseph,
How do you set the BIOS password on your machines? I assume you use the same configuration utility (CCTK). Would I just add a command line task in my OS deployment task sequence and execute the same command, replacing the “CURRENTPWD” value with my desired password?
Thank you. This blog is sooooo helpful. Hope you have/had a great vacation.