


Windows Server 2012 and Windows 8 are so similar that they even share the same version number (6.2)! It should come as no surprise that some desktop features have been integrated into Server (like the Start Screen). While having the Start Screen on Server isn’t the best in terms of diffusion, some great Server features did manage to make it back into Windows 8. The biggest example – Hyper-V! Now, on a client OS, you can natively run an entire virtual environment. In this guide, I’ll show you exactly how to do this so that you can start creating a Hyper-V lab on Windows 8.

A Glorious Sight!
Can You Run Hyper-V?
To run Hyper-V, your computer has to meet several hardware and software requirements. Here is the breakdown:
Hardware:
- 64-Bit Processor (you should be fine here, most modern machines have this)
- 4 GB of RAM
Your CPU always has to support four extra features to host virtual machines:
- Date Execution Prevention (DEP)
- Second Level Address Translation (SLAT)
- Virtualization in Firmware (either HAV or Intel VT)
- VM Monitor Mode Extensions
The easiest way to check your CPU is to launch a command prompt and type systeminfo . At the very bottom of the output, you should see a section named Hyper-V Requirements.

If the Virtualization in Firmware or VM Monitor Mode is set to NO, check your BIOS. You might need to enable those features. If DEP or SLAT is set to NO, you are probably out of luck and will need a new CPU. For kicks, you could always see if a BIOS upgrade would make those features available to your system.
Software
To run Hyper-V on the client, you must run either Windows 8 Professional or Windows 8 Enterprise and it must be the 64-bit version of that OS. Even with a 64-bit OS, you’ll still be able to run VMs that are 32-bit.
Turning on some Features
Launch Programs and Features. If you haven’t removed it from your WINX menu, you can easily access it there. Once populated, scroll to the Hyper-V section and select it. This will install the Hyper-V platform, Hyper-V Manager, the Hyper-V PowerShell module, and a few other tools.

For all of your PowerShell junkies out there, you will have to use the GUI method above. When running Install-WindowsFeature -Name Hyper-V on a client, you’ll get a nice error message. Apparently, that cmdlet is coded for a Server OS. If you are determined to use the command line, you can use DISM: Dism /online /enable-feature /featurename:Microsoft-Hyper-V -All
I Think You Have Management Potential
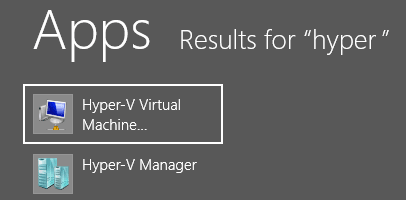
After restarting, you’ll have two new Start Screen shortcuts: Hyper-V Virtual Machine Connection and Hyper-V Manager. Launch Hyper-V Manager.
Your first step is to create a new Virtual Switch. This virtual switch will let your Hyper-V machines talk with each other and their Hyper-V host (your Windows 8 machine). To create your switch, select Virtual Switch Manager from the Action pane. Select Internal and then Create the Virtual Switch. Give your switch a name (such as Internal Network) and press OK. Press Yes to the Apply Networking Changes prompt. You will lose your network connection for a few seconds.
Time to create our first VM! You will need a copy of Windows Server 2012. If you want any clients, you’ll also need a copy of Windows 8.1. If needed, you can download trial copies from TechNet by using the two previous links.
In the Action pane, select New and Virtual Machine. Press next and give your VM a name. Because you are likely creating a test domain, you might name your first VM DC-01 (for domain control 1). On the next screen, you can configure the virtual memory. Both Server 2012 and Windows 8 can “run” with 512 MB of RAM. By setting your starting memory at 512 MB and enabling Dynamic Memory, machines will request memory as needed and will release it when no longer needed.
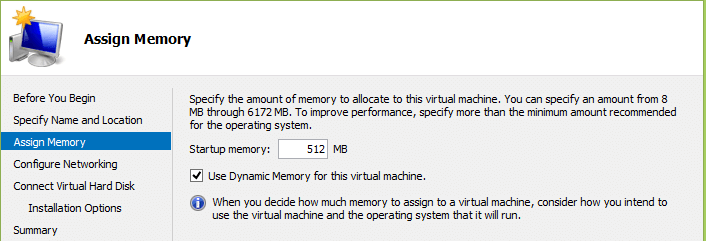
Dynamic memory is so efficient that I can run 3 VMs on my Surface Pro. That is a domain controller, member server, and a Windows 8 client + all of my normal apps (Outlook, IE, etc). All of this is sharing 4GB of RAM.
Moving on now, select your internal network on the Configure Networking page. When prompted to create your virtual hard disk, name the VHDX file as the same name of your VM. It will make migration and troubleshooting a lot easy. Don’t fret about the default 127GB file. The virtual hard disk will start out extremely small and will expand as needed. It will max out at 127GBs. In fact, all three of my Surface VMs have 127 GB drives – I hope they never call me on that debt…
Finally, select your installation media (either an ISO or a physical disc) and press Finish. Double click on your new VM and press the green power button to start it up! It should boot off your ISO/DVD and start installing Windows. If your mouse cursor gets stuck inside the VM, you can press CTRL + ALT + Left Arrow to release it.
So tell me – what do you plan on learning with your new lab? Active Directory/Group Policy? Server 2012? I am hoping to dive into System Center Service Manager.
Does windows 8 hyper-v support deploying to a NAS device? The machines do deploy but throw an error when they are powered on. They deploy fine to my local drives.
Hey Brian,
Windows 8 (Client) Hyper-V does not support storage on a NAS. I am not quite sure why but that is one of the few differences between client and server Hyper-V.
I think I am going crazy and have stumbled across your page, but please can you show how to create a isolated network – for a domain type environment which doesnt require access to the external network.
Hi Nathan,
You will want to create an internal network: http://technet.microsoft.com/en-us/library/ee256061(v=ws.10).aspx
Let me know if you have any other questions,
Joseph
Thank you for your article. This is awesome!
Thank you Megan! Hyper-V made a great addition to Windows 8.